Insight
How to Use Staging in Framer
Learn how Framer staging works and how to test forms, integrations, layouts, analytics, and website changes before deploying to production.
By
Alex Ran
·
5
min read
·
Last updated:
Key takeaways
Staging gives your team a published environment for final testing.
Test forms, integrations, responsive layouts, analytics, links, and embeds before deployment.
Keep production separate until the staged version has passed review.
Limit production deployment permissions while allowing the wider team to test changes safely.
Staging
A published test version of the website, separate from your live custom domain. Use it when an update is ready for browser, mobile, form, and integration testing.
Production
The public version visitors see on your custom domain. Update it only after the staged version has passed final review.
In simple terms:
A branch is an isolated workspace for changes.
Main is the reviewed version of your project.
Staging is the dress rehearsal.
Production is the live website.
Branching is used while the work is being created and reviewed. Staging is used after the work has been approved and is ready for final testing. With staging enabled, your public website only changes when someone deliberately deploys a version to production.
How to Use Staging in Framer
Once the approved work has been added to main, staging lets you test it as a published website before updating your live domain.
The staging site is separate from the production site:
Staging shows the version your team is currently testing.
Production shows the version currently available to the public.
This is useful because some issues are easier to find in a browser than in the Framer editor.
For example:
a form may not submit correctly
an embed may take time to load
a mobile layout may be cut off
a link may point to the wrong page
an analytics event may not fire
a cookie banner may behave unexpectedly
Staging is available on Framer Pro and higher plans and requires a connected custom domain.
1. Enable Staging
Open:
Site Settings → Staging & Versions
Select Enable Staging.
Once enabled, Framer separates your test site from your live site:
the Framer-provided domain shows the staged version
your custom domain continues showing the current live version
This lets you publish and review updates without changing what visitors see.
Example: Switch on Staging to create a buffer between making changes and publishing them to your visitors.

2. Publish to Staging
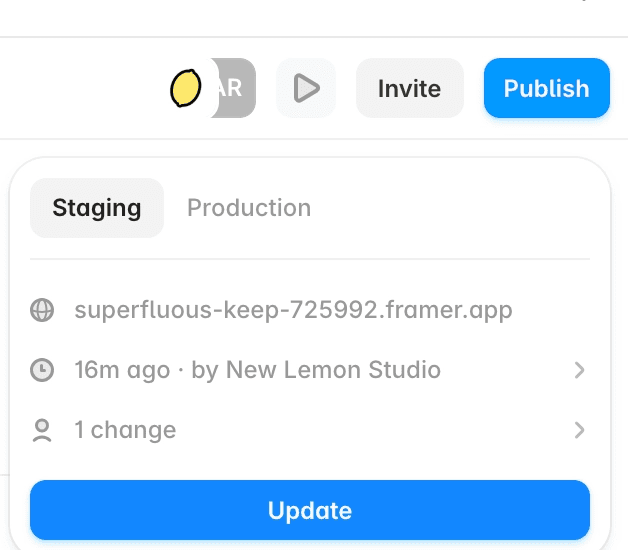
Open Framer’s publishing controls and choose the Staging environment.
Publish the latest version, then open the staging link in a browser.
For a B2B marketing website, check:
navigation and links
contact and demo forms
CRM routing
Calendly or other booking tools
CMS pages
desktop and mobile layouts
analytics and conversion tracking
cookie consent
embedded tools
redirects
You can publish to staging several times while fixing issues. None of these updates will affect the custom domain.
Example: Publish the latest changes to staging so your team can test them. Visitors will continue to see the current production version until you deploy the update.
3. Deploy to the Live Site
Once the staged version has been reviewed and approved, deploy it to production.
In plain terms, this publishes the tested version to your custom domain. Only this step changes the website your visitors see.
There are two ways to deploy:
In Site Settings → Staging & Versions, find the approved version and select Deploy.
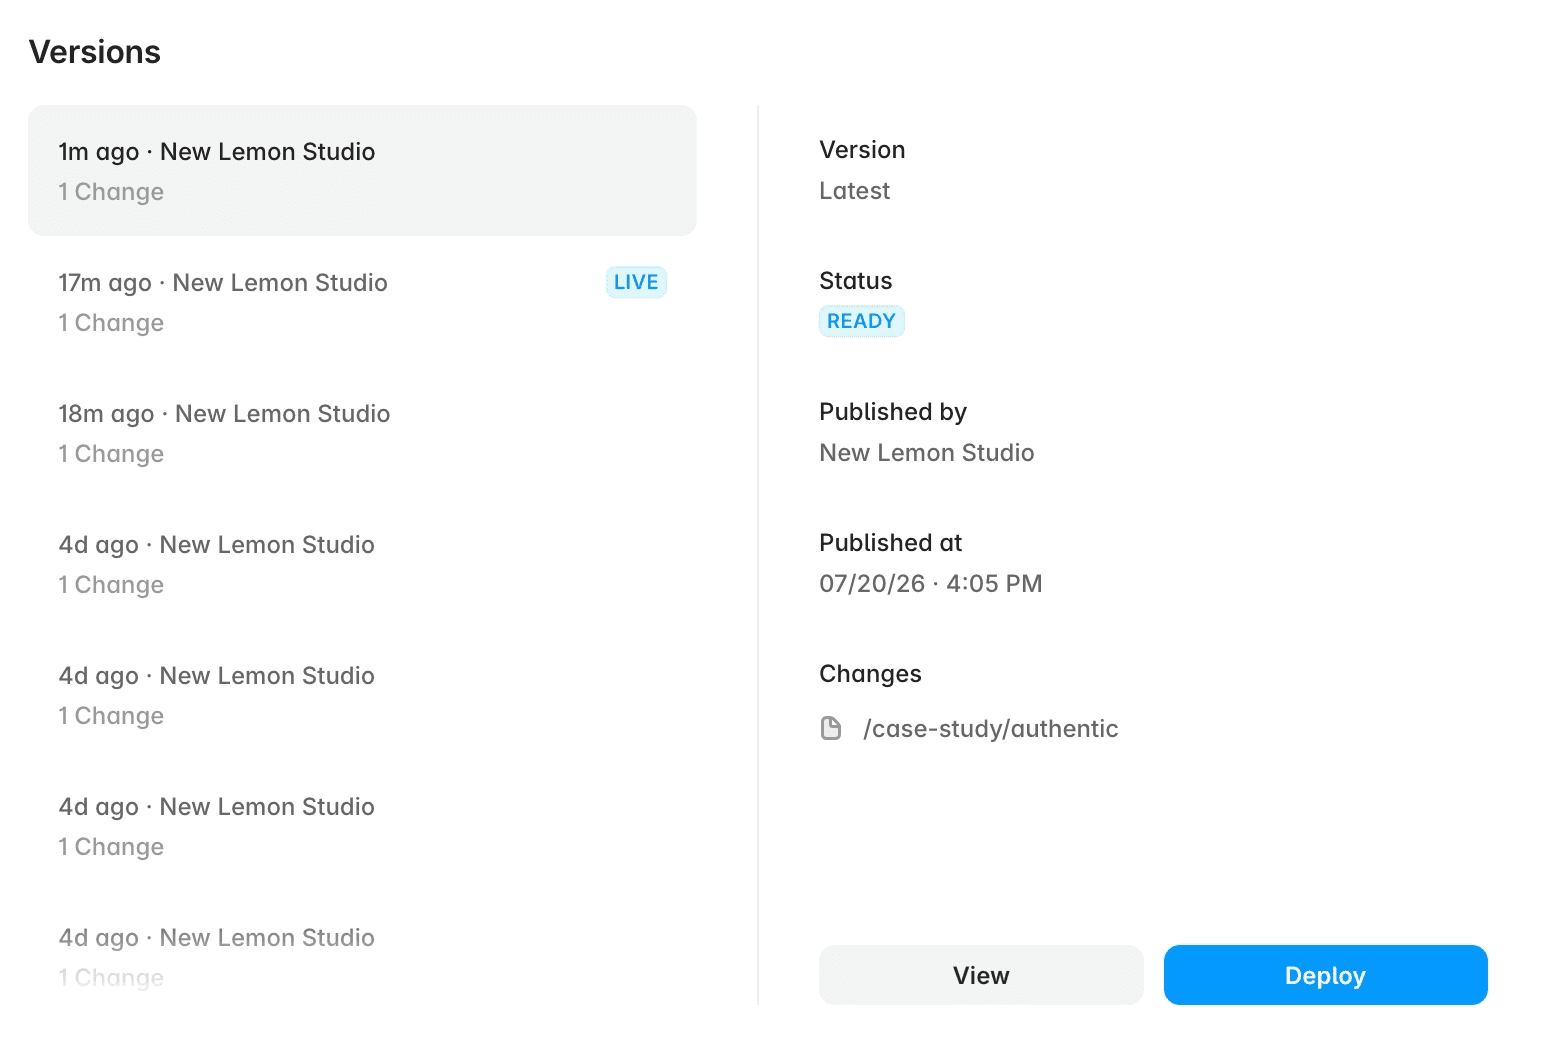
Open the publishing panel in the top-right corner, switch to the Production tab, and select Deploy Latest.

Use the Framer Publishing Workflow Template
For teams using both branching and staging, we created a Notion template that follows the full workflow:
Create a branch → Make changes → Review → Merge to main → Publish to staging → Test → Deploy to production
It is designed for marketing teams that want a clear process for review, QA, and final deployment, with staging enabled.
Use the Advanced Framer Publishing Workflow for Marketing Teams
Frequently Asked Questions
What Is Staging in Framer?
Staging is a published test version of the website. It lets your team review changes in a browser before updating the live domain.
What Is the Difference Between Branching and Staging?
Branching is used while the work is being created and reviewed.
Staging is used after the work has been approved and is ready for final testing.
Read more about branching and our recommend publishing workflow using branching.
Who Should Be Able to Deploy to Production?
For a B2B marketing team, we recommend limiting production deployment to a small number of trusted website owners.
With staging enabled, team members can publish and test changes on staging, while only members with Deploy permission can promote a version to the live site.
This gives the wider team room to work and test without giving everyone the ability to change the public website.
More insights


